WooCommerce Conditional Fields: Checkout Customization with CheckoutPlus


When it comes to optimizing your WooCommerce checkout process, customization is key. One powerful tool at your disposal is the CheckoutPlus plugin’s Conditional Fields feature. In this guide, we’ll explore how to use this feature to create a tailored checkout experience for your customers. By the end, you’ll be equipped to make your checkout process more efficient and user-friendly using conditional fields.
What Are WooCommerce Conditional Fields?
Conditional Fields in the CheckoutPlus plugin offer the flexibility to display or hide certain fields based on customer selections. This dynamic feature allows you to provide a personalized checkout journey by presenting only the relevant information and options to your customers.
Using Conditional Fields for Personalization
Step 1: Install and Activate CheckoutPlus
Start by installing and activating the CheckoutPlus plugin. Once activated, navigate to the “Conditional Fields” section within the plugin’s settings.
Step 2: Set Up Custom Fields
Head to the “Custom Fields” section in WooCommerce. Here, you can create the custom fields you want to display conditionally. These could be fields like “Special Instructions,” “Preferred Delivery Date,” or any other information you require from customers.
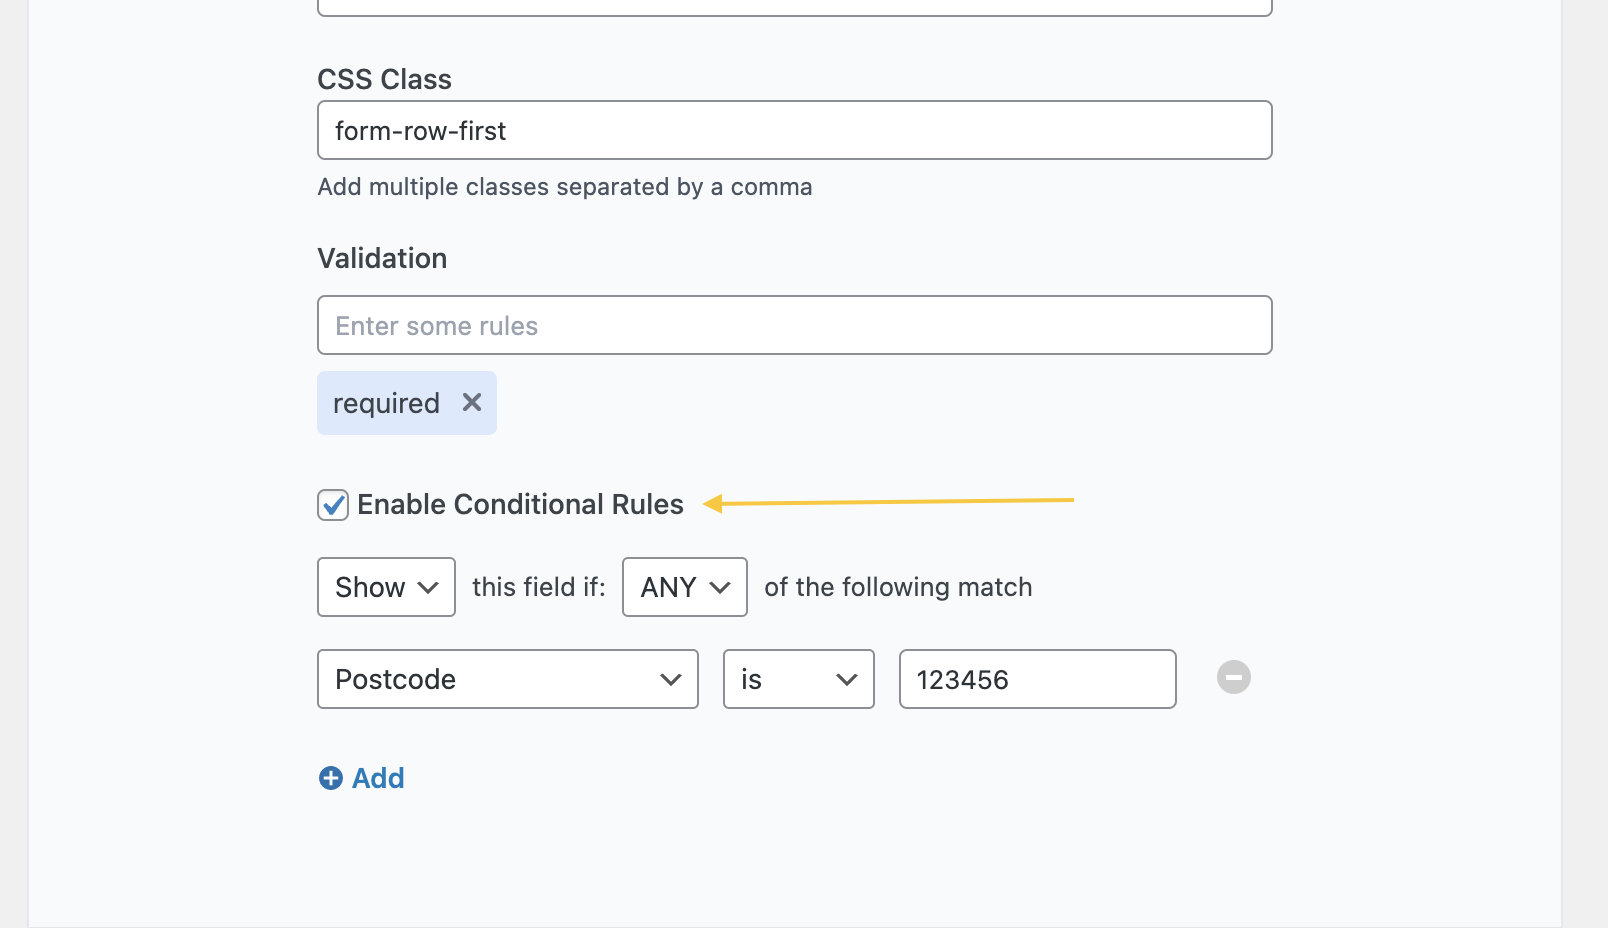
Step 3: Create Conditional Logic Rules
Define the conditions under which specific fields should appear. For instance, you can show a “Gift Wrap” option only if a customer selects multiple items. This logic ensures that customers encounter fields that are relevant to their choices.
Step 4: Experience the Dynamic Checkout
As customers interact with your checkout form, the conditional fields will adapt based on their selections. This means they’ll only see fields that are pertinent to their choices, resulting in a more streamlined and intuitive checkout process.
Benefits of Using Conditional Fields
- Enhanced User Experience: Customers appreciate a checkout process that caters to their needs. Conditional Fields ensure they only encounter fields relevant to their selections, simplifying their journey.
- Increased Conversions: By providing a personalized experience, you’re more likely to keep customers engaged and committed to completing their purchase.
- Reduced Cart Abandonment: Streamlining the checkout process with conditional fields can help minimize the chances of customers abandoning their carts due to a confusing or lengthy process.
Enhance Your Learning with Video and Documentation
To help you visualize the process, check out this informative YouTube video: Watch the Video.
For more in-depth instructions and insights, refer to the CheckoutPlus documentation: CheckoutPlus Documentation.
Conclusion
With CheckoutPlus’ Conditional Fields, you have the power to transform your WooCommerce checkout process into a user-centric experience. By presenting only the most relevant fields to your customers, you can create a smooth, personalized journey that increases conversions and customer satisfaction. Implementing conditional fields is a step toward elevating your e-commerce store’s checkout process to new heights.
Ready to take your WooCommerce checkout customization to the next level? Get the CheckoutPlus plugin today at https://pluginette.com/product/woocommerce-checkout-field-editor-checkoutplus/ and start creating a more personalized and efficient checkout experience for your customers.